Search The Cookery

Wednesday, February 3, 2010

Pizza night

Mr. Man has started a second job and is now working way longer days, leaving me to feed just M & myself most of the time. The thing is, at the best of times I'm all about convenience rather than health, and when I'm alone it's even worse. For example, yesterday I bought Kraft Dinner.

WHAT?

Yeah, it's this silly thing that I can't shake. Now, when I make the KD, I'm going to have broccoli and meat and other veggies too, all mixed together in a casserole, but that doesn't take away from the fact that it's KD.

The problem I run into is that I don't want my kid eating KD. So now my efforts to be lazy have doubled my workload because I have to make something healthy for him. In an attempt to avoid this backlash, I'm making an effort to think of delicious things that are both easy and healthy.

Like pizza!

So tonight I'm trying a thin crust veggie chicken pizza. I have a red pepper that I'm going to roast, and some bone-in chicken breast that I'm going to bake then shred. Of course, it wouldn't be The Cookery if I didn't use my mixer, so the pizza dough will be made in the mixer.

Now to figure out how to make thin crust. Off to google!

_______________________

So it turns out that I've broken off a bit of my flat beater attachment when making banana bread today! FLIP! I was going to use the weareneverfull recipe for thin crust dough, but it says to use the flat beater instead of the dough hook. Instead I just used my regular bread dough recipe, but I added a bit more oil than normal, and adjusted the amounts.

For toppings I used roasted red pepper, avocado and some shredded chicken. Roasting peppers is dead easy and so worth it for the taste.

Take your pepper and cut it into large pieces. Drizzle with olive oil (plenty now, don't be shy) then broil until they look burnt.


Take them out of the oven, or toaster oven, and let cool for a minute or so until transferring them into a freezer bag (like Ziploc). They'll steam nicely in there, loosening the skins. When you're ready for them, simply peel off the black skin and slice!


Pizza Dough

Ingredients:

1 c. warm water
1/2 tbsp. quickrise yeast
1/2 tsp. sugar
1/2 tsp. salt
2 tbsp. olive oil

Flour

Directions:

Mix yeast, sugar, and salt with oil and water. Let sit for a minute or so until foamy. Pour into your mixer bowl. Add 2 c. flour to start then continue adding until your dough is smooth and elastic and no longer sticky.

Rub with oil or flour and let rise for an hour or so, until doubled in size.

Preheat your oven to 450F, and put in your stoneware to heat up. I have one of those huge (and heavy) Pampered Chef bar pans, so that's what I'm using.

Punch down and begin to roll it out until it's almost translucent. Add your sauce and toppings, then bake for 7-9 minutes or until golden and cheese is melted. I baked my second pizza for more like 15 minutes and I liked the crust a lot better. The first one was okay, but became a bit too soft after cooling. I like it when the crust remains crunchy.


Voila! Pizza on a Wednesday. Tons of leftovers too, for which Mr. Man will be very grateful.

And it turns out that everyone was a fan! Yay for healthy options!

Monday, February 1, 2010

Chicken Conquistador

No, that's not what I made, it's my new title.

I made roast chicken again to resounding success! Maybe it's silly, but I'm really proud of myself for a) facing the headless chicken and b) coming out the other end with a meal, all without losing my lunch.

I made chicken with veg, stuffing and bruschetta this time. Here's how it broke down:

Chicken

Ingredients:

Herbes de Provence
Olive Oil
Kosher Salt

Directions:

Wash chicken inside and out with cold water. Pat dry, then rub with olive oil, sprinkle liberally with kosher salt and Herbes de Provence. I cut up some potatoes & added baby carrots to the pot as well.

Stuff & bake for about 3-3.5 hours at 375F. I basted the chicken quite regularly because I only really like white meat and dry meat makes me gag. Chicken is done when meat thermometer reads 180F or when juices run clear.

Pre-oven:


Post-oven:


Mushroom and Onion Stuffing

Ingredients:

1 tsp. coriander seeds
1 tsp. mustard seeds
about a cup sliced Cremini mushrooms
a medium red onion
2 tsp. poultry seasoning
about 3 cups dry bread chunks
1/4 c. Water or chicken stock
Olive oil

Directions:

Put a few glugs (maybe a tablespoon or so?) of olive oil in your saucepan over medium-high heat and allow to warm. Once it's quite hot add the coriander and mustard seeds, stirring occasionally until they start to pop.


Add the onion and lower heat to medium until onions are tender, about 8 minutes. Add mushrooms and poultry seasoning and continue cooking until the mushrooms are just brown, adding more oil as necessary. Remove from heat.


Add the bread chunks. (I used homemade rosemary and olive focaccia and white bread for the chunks. I just chopped it up then toasted for a hour in a 300F oven.) Add the water or stock, stirring well to combine.

Stuff into chicken, reserving extra to cook alongside the chicken for about 30-45 minutes.


Bruschetta

Ingredients:

4-5 very ripe small tomatoes, chopped roughly
1-2 cloves garlic, minced
2 tbsp. red onion, finely chopped
fresh or dried basil to taste
Olive oil

Directions:

Chop the tomatoes, then mix well with garlic, red onion and basil. Coat generously with olive oil. Cover and refrigerate for 4-6 hours (or as long as you can).


For the bread, I made focaccia earlier in the week, specifically for this recipe.


Cut the focaccia into 3/4 - 1 inch slices. Heat some olive oil in a heavy bottomed frying pan, about 2 tablespoons or so, over medium to high heat. Once the oil is hot, add your bread slices in a single layer. Fry until golden, then flip and fry the other side until golden, adding more oil if necessary.


Top warm bread with bruschetta mixture and chow down. You won't be able to stop yourself, I promise.


Also, I toasted a few slices just to see if frying the bread was really necessary, but it's TOTALLY necessary. Once you've fried your bread, you'll never go back to just toast. At least I won't!

The final results:


Everything was delicious, though the stuffing was a bit dry because I left it out too long while the chicken was roasting. Especially with the mushrooms, it tastes really good, but the texture has a lot to be desired.

P.S. Mr. Man thought it was hilarious that I thought this was a totally inappropriate place for the wishbone while he was carving. But since he was willing to cut it all up, I didn't make a fuss. I did, however, roll my eyes and make an icky face.

Friday, January 29, 2010

Rosemary & Olive Focaccia

Don't panic! I know this recipe sounds like I'm going to bake some Hollywood children, but it's really just bread. Delicious bread.

Disclaimer: I love bread. We go through at least a loaf a week, more when we're not rationing it. You're going to find a LOT of bread recipes on this blog once I get going. Today it's Focaccia.

I had olives left over from Greek Salad the other night and figured I could pop them in some bread. I needed to make focaccia anyway for a bruschetta recipe I came across the other day.

I used a recipe from Bon Appetit magazine, via Epicurious. I adjusted the instructions based on the comments/reviews.

Focaccia with Olives and Rosemary

Ingredients:

2 cups warm water (105°F; to 115°F;)
2 teaspoons dry yeast (I used quickrise)

4 1/2 cups (about) all purpose flour
2 teaspoons salt

3 tablespoons olive oil
24 black or green brine-cured olives (such as Kalamata or Greek),pitted, halved
1 tablespoon chopped fresh rosemary or 1 1/2 teaspoons dried

Directions:

Place 2 cups warm water in large bowl. Sprinkle dry yeast over; stir with fork. Let stand until yeast dissolves, about 10 minutes.

Add 4 1/4 cups flour and salt to yeast mixture and stir to blend well (dough will be sticky). Knead dough on floured surface until smooth and elastic, adding more flour by tablespoonfuls if dough is sticky, about 10 minutes. Form dough into ball. Oil large bowl; add dough, turning to coat. Cover with plastic wrap and let rise in warm area until doubled, about 1 1/2 hours. Punch down dough; knead into ball and return to same bowl. Cover with plastic wrap and let rise in warm area until doubled, about 45 minutes or less.

Coat 15x10-inch baking sheet with 1 tablespoon oil. Punch down dough. Transfer to prepared sheet. Using fingertips, press out dough to 13x10-inch rectangle. Let dough rest 10 minutes. Drizzle 2 tablespoons oil over dough. Sprinkle olives and chopped rosemary evenly over. Let dough rise uncovered in warm area until puffy, about 25 minutes.

Preheat oven to 475°F. Press fingertips all over dough, forming indentations. Bake bread until brown and crusty, about 20 minutes. Serve bread warm or at room temperature.


My changes:

1. I made two loaves, one with feta & rosemary and one with olives & rosemary. Both turned out great.

2. I kneaded in the olives and feta slices after the second rise, though I did reserve a few olives for the top.

3. I totally forgot to add the olive oil on top, and to make the little indentations. I remembered the oil about 10 minutes into the baking time and poured it on then. Seemed to work okay. Next time I'll make sure I remember.


Thoughts:

Dense and chewy, this bread is great for sopping up saucy or juicy dishes. We ate the feta loaf with some pasta & sauce, and it was a perfect complement. The dough is quite salty, but that just adds extra flavour to the sopping action. I'm anticipating it toasting/frying up really well tonight for the bruschetta base.

Thursday, January 28, 2010

Gnocchi

I was browsing through my cookbooks the other day searching for inspiration, and I came across the gnocchi recipe in Jamie Oliver's COOK book. It seemed simple enough and I had most of the ingredients, and we needed potatoes anyway, so I put it on my mental list to try.

Gnocchi. I understand now why you can buy it frozen. Who would want to go through the pain and heartbreak? Oh. Except for the fact that it's freakin delicious, even when it's melting on your spoon.

This is what epicurious.com has to say about gnocchi:

[NYOH-kee, NOH-kee]
Italian for "dumplings," gnocchi can be made from potatoes, flour or farina. Eggs or cheese can be added to the dough, and finely chopped spinach is also a popular addition. Gnocchi are generally shaped into little balls, cooked in boiling water and served with butter and Parmesan or a savory sauce. The dough can also be chilled, sliced and either baked or fried. Gnocchi are usually served as a side dish and make excellent accompaniments for meat or poultry.

© Copyright Barron's Educational Services, Inc. 1995 based on THE FOOD LOVER'S COMPANION, 2nd edition, by Sharon Tyler Herbst.


Oh sure, just shape them into little balls, boil, then toss with Parmesan. Trust me, it's a tad more complicated than that. I figured that out when I noticed that JO's directions mentioned having to do it a few times before getting it right. Turns out that I'm not that bad though!

Here's the recipe:

Gnocchi

Ingredients:

6 medium potatoes (I used Russet)
olive oil
1/2 a nutmeg (I used 1/2 tsp. and it was too much, next time I'll use only 1/4 tsp.)
sea salt and ground pepper
1 large egg yolk
1-2 handfuls of all purpose flour
semolina flour (I ended up using cornmeal because I was out of semolina)

Directions:

Preheat the oven to 425F.

Rub the potatoes with olive oil, prick them with a fork and lay them in a roasting tray. Bake for an hour or so, or until the potatoes are fluffy on the inside and crispy on the outside. (I baked mine 1h15m.) Allow them to cool for a couple of minutes and then, while they are still hot, use a dish towel to pick them up one at a time, cut them in half and carefully scoop out the flesh into your mixer bowl.


Mix until you have a very smooth mashed potato (I used the beater attachment, but you could probably use the whisk as well.)


Add the nutmeg, a tablespoon of salt, a pinch of pepper, the egg yolk and enough flour to bind it together. I ended up using about 3 tbsp. of flour.


Mix, then knead with your hands (unfortunately you can't get the stand mixer to do this for you) until you have a dry dough.

To get the hang of perfect gnocchi dough, you'll have to practice a few times. If you're unsure, try testing one by chucking it into some boiling water - if it falls apart, add a bit more flour.


I did have boiling water, and found that really useful for keeping me on track. It seems like a lot of work, but it's better than wasting a bunch of ingredients!

Divide your dough into three, then roll into a sausage.


Cut each sausage into 1 inch pieces. Place on a bed of semolina flour, then put in the fridge to set 10-20 minutes.


Once set, boil some salted water, and chuck them in! They take about 4 minutes to cook, they're done when they float. Be careful when you take them out. Keep in mind that they are little balls of mashed potato, you need to be gentle or they'll fall apart.

I cooked mine with some mushrooms that I sautéed.


Flippin' delish. The kiddo was a super fan too! Though I had forgotten to take his portion out prior to adding the red pepper flakes. Um, yeah, that didn't go over so well, but he was a trooper and just kept eating yogurt in between bites.

While the whole process takes a while, gnocchi is actually relatively easy to make. I won't be adding it onto the weekly menu, but I'll probably make it monthly. One of the best parts of staying at home with the kiddo is that I have the time to do this kind of thing. Once the second one comes along this blog will be full of grilled cheese and tomato soup.

Monday, January 25, 2010

Recipes coming!

I faced off against a dead chicken on Saturday to extraordinary results! I have that post almost done.

Also, today I am trying a new pasta recipe, so I'll let you know how that turns out!

XOXO,
Miss K

Saturday, January 23, 2010

Stretching my wings, so to speak

When I was sixteen my family moved to warmer climates and I got a job working at a little health food café. We sold things like tofu and made fresh carrot juice every morning. We had herbal teas and essential oils on the shelf. Our friendly cook made rice and beans everyday. The popcorn-y smell of basmati rice still brings back memories to this day. All this to say, it rocked my world.

I grew up in a house that valued (and in fairness, I suppose it had to) eating to live rather than eating to enjoy food. We ate a lot of staple foods: potatoes, beef, broccoli, and corn. When I began working at the health food store, I met people that viewed food and the act of eating very differently than me. I tried tofu smoothies to start (delicious), then smoked tofu on pizza (heavenly), eventually moving along the spectrum to a full out vegetarian.

Turns out I didn't like tofu enough to eat it as my main protein source though, and I hadn't yet been won over by other legumes, so I ended up going back to meat a few years later. I couldn't stomach pork or beef and seafood grossed me out, so I went back to chicken. Good ole chicken. Not with bones though. Or skin. Or dark meat. It had to be boneless skinless chicken breast. I just couldn't deal with it otherwise, I would start to become faint even walking through the red section of the meat aisle, and bones in anything were a dealbreaker. No matter how good it was, I didn't want to be reminded that I was eating an ANIMAL!

Needless to say, but I'll say it anyway, I have never entertained the idea of cooking a whole turkey or chicken. Ugh. The skin, the bones, the cavity! There's no pretending it's something else other than a dead animal. So. Accept it. Move on. Right? Well, yes. Right.

When my friend L brought a gorgeous herbes de provence bread to my attention and Mr. Man brought home some recipes for roast chicken, I figured it was time to face my chicken fears. At the grocery store, I just bought the first package I saw. It happened to have two chickens, so be prepared for another recipe once I've dealt with this one. I also figured that if the first one was a complete disaster, at least I could try again. If the second one went the way of the first, I'd be comfortable saying that at least I gave it a fair shot and I could walk away from the chicken with a sigh of relief.

Turns out, I'm a half decent chicken cook. Leaving aside that given my one experience, I'm not sure how it would be possible to screw up roast chicken, I was very pleased with how well I had fared against my nemesis. Here's the breakdown.

P.S. I apologize in advance that I don't have any fully finished photos of the bird, we ended up eating over at my in-laws' house and I forgot the camera. D'oh! Next time!

Caramelized Onion and Apple Stuffing - KM styles

Ingredients:

1 small red onion, thinly sliced
4 tbsp. of unsalter butter (divided)
2 small heads of bok choy or about 2/3 c. of celery, sliced
1.5 local apples (I used Spartan), cored, peeled, and chopped
1 tsp. dried ground sage
2 or so c. of old (but not mouldy) bread (I used 3 day old baking powder biscuits)
30 ml chicken stock
1 tbsp. apple cider vinegar

Directions:

In large sauce pan, melt half of the butter over medium-low heat; cook onions and half each of the salt and pepper, stirring occasionally, until golden, about 15 minutes. Transfer to large bowl.


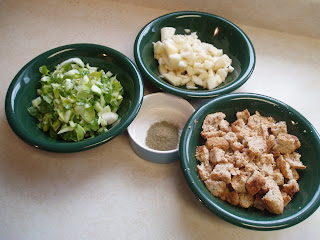
In same skillet, melt remaining butter over medium heat; fry bok choy/celery, apples, sage, and remaining salt and pepper, stirring occasionally, until softened, about 15 minutes. Add to bowl.

Add bread, stock, and vinegar; mix well.


Olive Oil and Herbes de Provence Bread

This comes from my friend L who had great results.

Ingredients
1 teaspoon sugar
1 envelope yeast (1 tbsp)- I used QuickRise
1 cup lukewarm water
1/4 cup olive oil
1 teaspoon salt
2-1/2 cups flour, more if needed
1 tablespoon herbes de provence

Directions

Stir the sugar, yeast, oil and salt into the water, and set aside for 10 minutes to dissolve. Fluff with a fork if need be, it should be quite foamy.


Put yeast mixture in your stand mixer. Beat in 1-1/2 cups/285 g of the flour, until smooth, along with the herbs. Work in the remaining cup/125 g flour, until you have smooth, springy dough.

Cover with a tea towel and set in a warm place to rise to double, about 45 minutes. I always use my oven with just the oven light turned on for a bit of heat. Works like a charm, even when it's -30 outside!

Punch the dough down and shape it. L made a really nice round artisan type loaf, and I made buns.


Let rise again 45-60 minutes and bake at 400ºF/200ºC for 25 minutes until done. I took the buns out after 20 minutes, and they were baked perfectly.

Let the bread cool a little before slicing to serve.


Roast Chicken - KM Styles

Ingredients:

1 2-3 pound fryer chicken
a lemon
some Herbes de Provence (see a theme?)
olive oil

Directions:

Preheat oven to 450F.

Basically I just washed, then stuffed the chicken. Put it in my dutch oven, then patted it down with a mix of lemon juice, oil and Herbes de Provence. I had ground the Herbes de Provence quite fine in my coffee grinder because I hate those whole rosemary pieces. I sprinkled a bit of the regular stuff over top though since it looks nicer.

Roast chicken for 15 minutes. Baste. Turn down to 375F and cook for another 50-60 minutes or until juices run clear and temperature registers 180F. I had the lid off most of the time.

FYI - For you experienced chicken roasters, you'll have likely looked at the times quoted and had a good chuckle. Yes, it takes about 2.5 hours at 375F to cook thoroughly when stuffed. I'm sure if I had left the cavity empty, an hour and a bit would have been enough.

As you can see I added potatoes because I love me some roasted potatoes.


This all comes down to:

Miss K: 1
Chicken: 0

Re-match next week!

Thursday, January 21, 2010

Pancakes - Our weekly indulgence

Every weekend we have pancakes. Usually on Sundays, but sometimes both Saturday and Sunday. Or sometimes we'll have crêpes on Saturday and then pancakes on Sunday. Hm, that reminds me to talk about crêpes next week, I have all sorts of stories about those!

Back to pancakes though. I had never really had a proper fluffy pancake unless I was in a restaurant. I could never get my pancakes that I tried to be fluffy enough. I wanted big, thick pancakes, not tiny, hard little nubbin pancakes. Eventually I gave up.

When I bought Jamie Oliver's Happy Days though, I saw his recipe for USA pancakes. They were fluffy he said. The picture looked fluffy. I started to hope. At the time I only had a handmixer though and there was no way that I was going to stand at the counter and whip egg whites just so I could have fluffy pancakes. (That's right I said it again. Fluffy pancakes. If this was a drinking game you'd be drunk by now.)

When I bought my stand mixer though, I thought, what the heck, I'll give them a try. And a weekend tradition was born. What's great about these is that you can make all sorts of variations and they inevitably turn out well. I think it's the egg whites. Make sure they're nice and stiff.

You'll need:

3 large eggs
1 scant cup of flour (white or wholewheat, doesn't matter)
1 heaping teaspoon of baking powder
a bit of salt
1/2 cup plus 2 tablespoons of milk/water/soy drink (vanilla flavoured soy stuff is delicious)

Separate your eggs, putting the white in your mixing bowl and tossing the yolk into a separate bowl. Start whipping your whites. It'll take a while.

Add the rest of the ingredients to your yolks. Pay more attention to the consistency than to the measurements. It should be thick and sticky, but not doughy. Add more milk/flour if need be.


Your egg whites should be nice and stiff, but not yet shiny. It'll come from your mixing bowl all in one clump.


FOLD into your batter. The whole point is to have FLUFFY pancakes, so be gentle.


I use an electric skillet set to between 300 and 350 degrees. Splat in some margarine for the first batch if you want, though it's not necessary. Grill until bubbles form, the edges are dry and the bottom is golden brown. Flip, cook until golden brown and then move to a warm plate.


Mr. Oliver suggests all sorts of things on pancakes like corn, blueberries etc. My husband insisted on the corn pancakes at harvest time in September and voted them thumbs-up, so you can give it a try if you want! Just shuck fresh corn and then skim the kernels into your batter. Mr. Man also just tried pancakes with cheese last time. He was okay with it, though I had made the batter quite vanilla-y and he would prefer a savoury pancake with the cheese. Who knew? I'll see what I can come up with next time.

I usually go for the peanut butter, then topped with banana and maple syrup, but that's just me. Maybe I'm old-fashioned. Or maybe, I just love my fluffy pancakes.

As an aside, you can make a double batch and then freeze the ones you don't eat. Just pop them in the toaster oven or the toaster. Almost as good as fresh! I usually put them in between wax paper and then use a Ziploc freezer bag for storage. Needs to be Ziploc, I've found, or they get really dry.